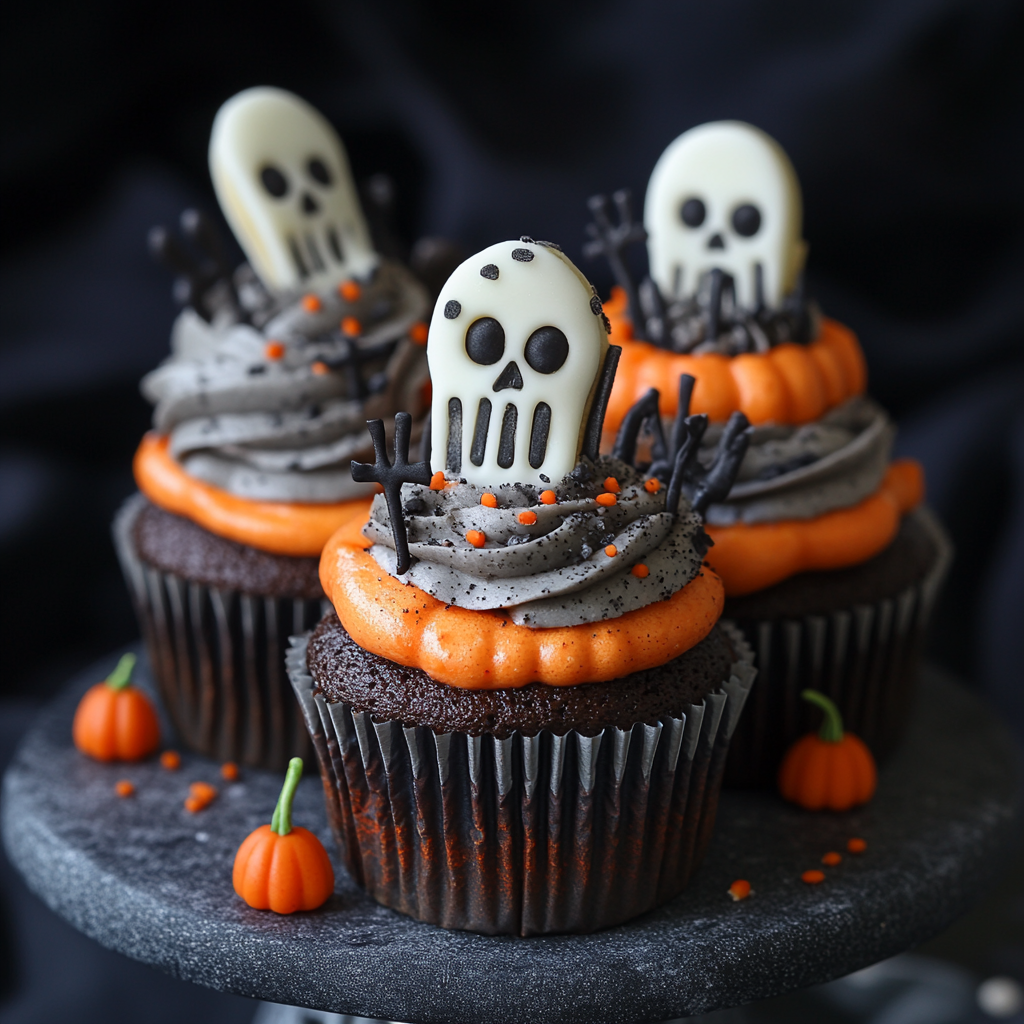
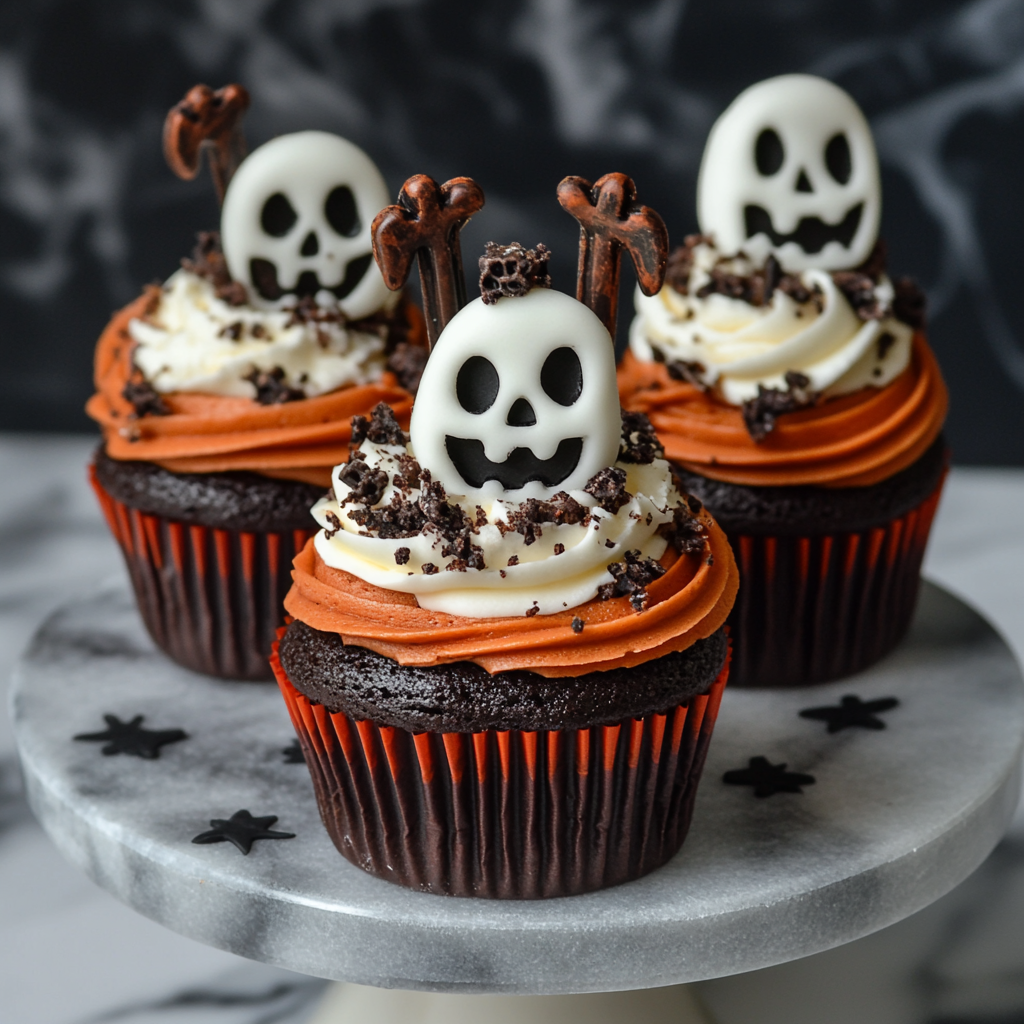
Halloween Graveyard Cupcakes are an exciting treat perfect for your spooky celebrations. These delightful cupcakes not only look like a graveyard but also boast a creamy Oreo cheesecake filling and rich chocolate buttercream. Ideal for Halloween parties, school bake sales, or just to impress your friends and family, you’ll love the fun presentation and delicious flavors.
Why You’ll Love This Recipe
- Spooky Presentation: These cupcakes are designed to look like a graveyard, making them a hit at any Halloween gathering.
- Decadent Flavor: The combination of dark chocolate, creamy cheesecake, and crunchy Oreos creates a delightful taste experience.
- Easy to Customize: You can alter the decorations to suit your style or use different colors for special occasions.
- Perfect for Sharing: With 12 servings per batch, these cupcakes are great for parties or as treats to share with neighbors.
- Fun to Make: Get creative with the decorations! Involve kids in the process for some family bonding time.
Tools and Preparation
Before you start baking, gather all necessary tools to ensure a smooth process. Having everything at hand will make your experience enjoyable.
Essential Tools and Equipment
- Cupcake tin
- Cupcake cases
- Electric whisk or stand mixer
- Piping bags and nozzles
- Mixing bowls
- Baking paper
Importance of Each Tool
- Electric whisk or stand mixer: Helps achieve fluffy batter by efficiently mixing ingredients.
- Piping bags and nozzles: Perfect for decorating cupcakes with precision, especially for the buttercream designs.
Ingredients
For the Cupcakes
- 12 Lotus biscoff biscuits
- 150 g Dark chocolate (melted)
- 30 g White chocolate (melted)
- 175 g Baking spread or butter (softened, unsalted)
- 175 g Caster sugar
- 3 Eggs (large)
- 2 tbsp Milk
- 150 g Self raising flour
- 25 g Cocoa powder
- 1/4 tsp Baking powder
For the Oreo Cheesecake Filling
- 115 g Full fat cream cheese
- 15 g Icing sugar
- 15 g Oreos (crushed)
- 1/8 tsp Vanilla extract
For the Chocolate Buttercream
- 100 g Butter (softened, unsalted)
- 165 g Icing sugar
- 35 g Cocoa powder
- 1-2 tsp Milk
For the Green Grass Buttercream
- 25 g Butter (softened, unsalted)
- 50 g Icing sugar
- 1/8 tsp Vanilla extract
- Green food colouring
- 35 g Oreos (crushed)
How to Make Halloween Graveyard Cupcakes
Step 1: Prepare the Biscuit Graves
Start by making the biscuit graves. Snap about a third of each biscuit off at one end to create shorter gravestones. Melt the dark chocolate and dip each biscuit into it. Place them on baking paper to set.
Step 2: Decorate the Biscuits
Once the dark chocolate has set, melt the white chocolate and place it in a piping bag. Pipe your chosen designs onto the biscuits and let them set again.
Step 3: Preheat Your Oven
Preheat your oven to 140C Fan/160C/325F/Gas Mark 3. Line a cupcake tin with cupcake cases.
Step 4: Make the Sponge Cake Batter
In a mixing bowl, combine the baking spread and caster sugar using an electric whisk or stand mixer for about 5 minutes until light and fluffy. Add in eggs and milk, whisking well until combined.
Step 5: Fold in Dry Ingredients
Gently fold in self-raising flour, cocoa powder, and baking powder until fully incorporated.
Step 6: Bake the Cupcakes
Divide the mixture evenly among your cupcake cases. Bake for 25-30 minutes or until a skewer inserted into them comes out clean. Allow them to cool completely.
Step 7: Prepare Oreo Cheesecake Filling
While cupcakes cool, mix cream cheese, icing sugar, and vanilla extract until smooth. Stir in crushed Oreos until integrated.
Step 8: Core Each Cupcake
Using a cupcake corer or knife, create holes in the center of each cooled cupcake.
Step 9: Fill with Cheesecake Mixture
Fill each hole with Oreo cheesecake filling using either a spoon or piping bag.
Step 10: Make Chocolate Buttercream
Mix softened butter with cocoa powder and icing sugar until smooth; gradually add milk as needed for consistency.
Step 11: Pipe Chocolate Buttercream
Use a piping bag fitted with a round nozzle to pipe chocolate buttercream on each cupcake. Smooth out tops for an even finish if desired.
Step 12: Decorate with Biscuit Graves
Insert one decorated biscuit gravestone into each cupcake.
Step 13: Sprinkle Oreo Soil
Sprinkle crushed Oreos around each biscuit grave to mimic soil.
Step 14: Prepare Green Grass Buttercream
Mix softened butter with icing sugar; add vanilla extract and green food coloring until you reach your desired shade of green.
Step 15: Add Final Touches
Use another piping bag fitted with a grass nozzle to pipe green grass around each grave. Alternatively, create texture using small blobs of buttercream.
Step 16: Storage Instructions
Store any leftovers in an airtight container in a cool place; consume within three days for best freshness.
How to Serve Halloween Graveyard Cupcakes
These Halloween Graveyard Cupcakes are not only delicious but also visually stunning. They can be served in various ways to enhance your spooky celebrations.
For a Spooky Buffet
- Display on a themed platter: Use a black or orange tray to create a festive atmosphere.
- Add creepy decorations: Incorporate plastic spiders or small skeletons around the cupcakes for an eerie touch.
As Party Favors
- Individual packaging: Place each cupcake in clear treat bags tied with a spooky ribbon.
- Personalized labels: Attach custom labels with fun Halloween messages for a personal touch.
Pair with Halloween Beverages
- Serve with pumpkin spice lattes: The warm spices complement the chocolate flavor of the cupcakes.
- Offer spooky punch: A green or red fruit punch can add to the festive theme.
How to Perfect Halloween Graveyard Cupcakes
Creating the perfect Halloween Graveyard Cupcakes requires attention to detail and some helpful tips.
- Use fresh ingredients: Ensure all your ingredients, especially dairy, are fresh for the best flavor and texture.
- Cool cupcakes completely: Allow the cupcakes to cool fully before frosting to prevent melting.
- Experiment with piping techniques: Use different nozzles for decorating to add more character and dimension.
- Chill before serving: Refrigerate decorated cupcakes for about 30 minutes; this helps set the frosting and makes them easier to handle.
Best Side Dishes for Halloween Graveyard Cupcakes
Complement your Halloween Graveyard Cupcakes with some fun and thematic side dishes that add variety to your spread.
- Pumpkin Soup: A creamy, spiced soup that brings warmth and seasonal flavors, perfect for autumn gatherings.
- Witch’s Fingers Breadsticks: These garlic breadsticks shaped like fingers add an eerie yet tasty element to your table.
- Ghostly Mashed Potatoes: Whipped potatoes piped into ghost shapes and adorned with olive eyes create a whimsical side dish.
- Roasted Vegetable Medley: A colorful mix of seasonal veggies roasted with herbs offers a healthy, savory contrast.
- Monster Fruit Salad: A vibrant salad featuring assorted fruits, cut into fun shapes, makes for a refreshing treat.
- Eyeball Pasta Salad: Pasta salad with mozzarella balls as eyeballs adds a playful touch while being deliciously satisfying.
Common Mistakes to Avoid
When making Halloween Graveyard Cupcakes, it’s easy to overlook some details that can affect the final result. Here are common mistakes and how to avoid them.
- Overmixing the batter: Mixing too much can lead to dense cupcakes. Mix just until combined for a light texture.
- Ignoring cooling time: Filling warm cupcakes with cheesecake can cause melting. Ensure they cool completely before filling.
- Skipping the biscuit gravestones: These add an essential decoration. Don’t forget to prepare and set them before decorating.
- Not measuring ingredients accurately: In baking, precision is crucial. Use a kitchen scale for best results.
- Using old ingredients: Fresh ingredients yield better flavor. Always check your baking supplies’ freshness before starting.
Storage & Reheating Instructions
Refrigerator Storage
- Store in an airtight container for up to 3 days.
- Keep away from strong odors to maintain flavor.
Freezing Halloween Graveyard Cupcakes
- Freeze for up to 2 months in a suitable container.
- Wrap each cupcake individually in plastic wrap to prevent freezer burn.
Reheating Halloween Graveyard Cupcakes
- Oven: Preheat oven to 175°C (350°F) and heat for about 10 minutes.
- Microwave: Heat for 15-20 seconds for a quick warm-up; do not overheat.
- Stovetop: Place in a covered pan on low heat for a few minutes, checking frequently.
Frequently Asked Questions
What are Halloween Graveyard Cupcakes?
Halloween Graveyard Cupcakes are chocolate cupcakes designed to look like a spooky graveyard, filled with Oreo cheesecake and topped with chocolate buttercream.
How long do Halloween Graveyard Cupcakes take to make?
The total time is approximately 85 minutes, including both prep and bake time.
Can I customize my Halloween Graveyard Cupcakes?
Yes! You can add different toppings or fillings, such as fruit purees or different types of cookies for decoration.
Are Halloween Graveyard Cupcakes suitable for kids?
Absolutely! These cupcakes are fun and festive, making them perfect for children’s Halloween parties.
How should I store my Halloween Graveyard Cupcakes?
Store in an airtight container in the refrigerator or freeze them if you want to keep them longer.
Final Thoughts
These Halloween Graveyard Cupcakes are not only visually striking but also deliciously rich with flavors. They’re perfect for gatherings or as a fun activity with family and friends. Feel free to customize them with your favorite fillings or decorations!
Halloween Graveyard Cupcakes
Get ready to impress your guests with these Halloween Graveyard Cupcakes! These whimsical treats are designed to resemble a spooky graveyard, making them a delightful centerpiece for your Halloween festivities. Each chocolate cupcake is filled with a creamy Oreo cheesecake filling and topped with rich chocolate buttercream, creating a perfect balance of flavors. The fun doesn’t stop there; you can customize the decorations to suit your style, ensuring they are as unique as your celebration. With easy-to-follow instructions, these cupcakes are not just delicious but also an enjoyable baking project for the whole family. Perfect for parties, bake sales, or simply as a festive treat, these cupcakes will be a hit with both kids and adults alike!
- Prep Time: 30 minutes
- Cook Time: 30 minutes
- Total Time: 1 hour
- Yield: Makes 12 servings 1x
- Category: Dessert
- Method: Baking
- Cuisine: American
Ingredients
- 12 Lotus biscoff biscuits
- 150 g dark chocolate (melted)
- 175 g baking spread or unsalted butter (softened)
- 3 large eggs
- 150 g self-raising flour
- 115 g full-fat cream cheese
- 165 g icing sugar
- 30 g white chocolate (melted)
- 2 tbsp milk
- 25 g cocoa powder
- 1/4 tsp baking powder
- 15 g icing sugar (for filling)
- 15 g Oreos (crushed, for filling)
- 1/8 tsp vanilla extract (for filling)
- 100 g butter (softened, unsalted, for buttercream)
- 35 g cocoa powder (for buttercream)
- 1–2 tsp milk (for buttercream)
- 25 g butter (softened, unsalted, for green grass buttercream)
- 50 g icing sugar (for green grass buttercream)
- 1/8 tsp vanilla extract (for green grass buttercream)
- green food coloring
- 35 g Oreos (crushed, for decoration)
Instructions
- Prepare biscuit graves by snapping biscuits and dipping them in melted dark chocolate. Let set.
- Preheat oven to 140C Fan/160C/325F/Gas Mark 3 and line cupcake tin with cases.
- Beat together baking spread and sugar until fluffy. Add eggs and milk, mix well.
- Fold in flour, cocoa powder, and baking powder until combined.
- Bake cupcakes for 25-30 minutes until a skewer comes out clean. Cool completely.
- Mix cream cheese, icing sugar, and crushed Oreos for filling; core cupcakes and fill them.
- Prepare chocolate buttercream by mixing softened butter, icing sugar, and cocoa powder; pipe onto cooled cupcakes.
- Decorate each cupcake with biscuit graves and sprinkle crushed Oreos around.
Nutrition
- Serving Size: 1 cupcake (80g)
- Calories: 320
- Sugar: 28g
- Sodium: 210mg
- Fat: 16g
- Saturated Fat: 9g
- Unsaturated Fat: 5g
- Trans Fat: 0g
- Carbohydrates: 42g
- Fiber: 1g
- Protein: 4g
- Cholesterol: 50mg
Leave a Comment